Search This Blog

Monday, November 15, 2010

Broccoli Rabe, Pasta and Sausage

A few weeks ago, my husband and I and a few friends went to Arthur Avenue, Little Italy in the Bronx for those of you who are not familiar, and dined at Mario's Restaurant (Check out this link: www.mariosrestarthurave.com) I had a lovely eggplant dish which I enjoyed, but I was curious about another dish that was ordered,  broccoli rabe and sausage, with rigatoni.  For such a special and supposedly flavorful dish, it looked a bit plain, so I thought: I would do some research and create a Broccoli Rabe, Pasta and Sausage dish that will be a party in the mouth, with enough spice to enhance the flavorful vegetable and sausage without overwhelming them.

I think I was successful. I did a thorough search of both internet and cookbook recipes and created a lovely dish that I think fits the bill.  No offense to Mario, though, we all enjoyed our food:  I just wanted to tinker!

Broccoli rabe is an acquired taste. I do not think there is not one child on earth who will go within ten feet of it; the bitterness scares them. Many adults not of the Italian persuasion, and some who are,  think it is awful.  I used to hate it but now I LOVE it.  I found, however, I love it better when it has been pre-cooked, or blanched. That takes some of the bitterness out of it and makes it tender.

Check out my note at the end of the ingredients below: if you hate broccoli rabe, just simply cannot bear it, you can substitute! It works well.

Some of the recipes called for one pound of sausage, which would have made the dish way too rich.  Also, to avoid the bland pasta, I used very good pasta imported from Italy, the kind in the cellophane bag that almost looks fresh. It is not completely dried, in fact, the ingredients listed on the package include semolina and water. Regular boxed pasta, which is good for most uses, are completely dried.

I chose the brand Tarall'oro bought at Fairway and used a shape called Oreccheitte Caserecce.  Orecheitte means "little ears", and yes, that is what they look like. Caserecce means homemade, and they do look homemade!  They also look like little hats. Very cute.


I used to think that it didn't matter about the shape, pasta was pasta. Not true!  They differ in how they handle the various sauces.  I also used a method of cooking that I do not normally use, that I always see on the cooking shows but never really did,  which is to cook the pasta part way, about 3/4, and finish the rest in the pan.  I found that the pasta cooked in this way absorbed the juices from the vegetables, meat, broth and wine and other flavorings and lent a creaminess to the dish.  I tell you, it was all I could do not to completely inhale the dish before I served it, it was that good!!!


BROCCOLI RABE, SAUSAGE, AND PASTA

1/2 pound Italian sweet pork sausage, out of casing ( some markets sell patties so you don't have to take them out of the casing)
1 pound Italian imported pasta, orecheitte or something similar)
1 bunch broccoli rabe, chopped and large stems removed, blanched, drained, and set aside.
I medium onion, sliced
3 cloves sliced garlic
1 cup dry white wine
1 cup beef broth
2-3 tablespoon fresh chopped flat leaf parsley
1 teaspoon fresh oregano or 1/2 tsp dried oregano (I like Wild Sicilian Oregano, look for it)
1 teaspoon dried thyme
Extra virgin olive oil
Salt, pepper to taste
Red pepper flakes to taste
Pecorino Romano grated cheese

Note: If you REALLY REALLY hate broccoli rabe, you can use broccoli, broccoletti, escarole, swiss chard, or even spinach for this dish.
  • Cook pasta in salted water until 3/4 done. It should be harder than al dente.  Reserve in bowl, sprinkle with olive oil and stir to avoid sticking.
  • Blanch the broccoli rabe: Boil water in a medium saucepan, and place the broccoli rabe in the water until just wilted. Drain well and set aside.
  • Remove the sausage from the casing and break it up into small pieces. You can use your fingers or an old fashioned potato masher. Heat a large, high sided (12") saute pan, and cook the sausage until browned but not crispy. Reserve.
  • In the sausage fat and some olive oil if necessary, saute sliced onion until brown and carmelized but not crispy or burnt, saute about 4 or 5 minutes. Add the sliced garlic about halfway through to avoid overbrowning. Add red pepper, salt and pepper. 
  • Add the liquids: add the wine to the onion/garlic mixture in the pan and reduce to half. Add the broth and the sausage and reduce until thickened. 
  • Add broccoli rabe, the rest of the herbs and spices, and stir to combine, cook about 5 minutes.
  • Add pasta to mixture, cover and cook until al dente or to taste. You might have to add some water, I reserve some of the pasta water for this purpose, it will thicken the dish more so than plain water.
  • Correct for taste: make sure you use enough salt!
For garnish: Romano cheese for a kick, Parmigiana for a more subtle flavor. You can use a spoonful of Ricotta cheese and some more fresh parsley:  pretty and delicious!

Next time I am going to introduce to you a surprisingly odd but delicious fall dish: Pasta with yellow winter squash, subtly flavored with garlic. This is a family recipe: I have never seen it anywhere else, so I think it is pretty special, and I think you will enjoy it.  This week I am experimenting with butternut, acorn or sweet yellow squash to see which is best.

Happy Thanksgiving!

Thursday, October 21, 2010

Oh, that fennel: Pasta with breadcrumbs!

These past few weeks, I set about to create a dish that was remembered from long ago: a traditional Sicilian dish, pasta with breadcrumbs or Pasta con Pangrattato.  My first attempt was a result of family and friend discussions, internet and cookbook  research. The recipes mostly called for anchovies, breadcrumbs, olives, capers, and olive oil, as well as seasonings. I used store-bought unflavored breadcrumbs from an Italian bread bakery.  The result was tasty but just OK.  The breadcrumbs had a sandy texture, the flavor was savory but was too subtle. The olives and capers were fine but we felt there was too much going on. We were looking for something that was delicious and savory, but simple. I couldn't go overboard with the anchovies I am the only one in my family who enjoys them. So I set out to make a breadcrumb mixture that could stand on its own without the sharp anchovy flavor.

One suggestion to improve the breadcrumb texture was to make breadcrumbs the old fashioned way: hand grating.  I cut up some leftover Italian bread and let it sit a few days in a brown paper bag. With the use of a repurposed meat grinder, we grated the rock-hard bread. The resulting crumbs were not uniform, as they are when store bought, which I thought should improve the texture. I put it away for the next day. That night, I did some more research and then heard from my friend Mary Ellen, who is Sicilian, and found that in this dish, which is a traditional dish made for St. Joseph's day in March, calls for the use of fennel leaves in the pasta water! I never heard of such a thing, and I had those pretty fronds that I packed away a few days ago, left over from the fennel dish I discussed in my last blog post. I couldn't believe it. It is supposed to give a very subtle flavor, I couldn't wait to try it.

  The next day, I  gathered all the other ingredients together:
Pictured: the fennel fronds, garlic, olive oil, cayenne pepper, Sicilian sea salt, and Pecorino Romano cheese and basil leaves for garnish. I decided to use Barilla fettucini for the pasta.

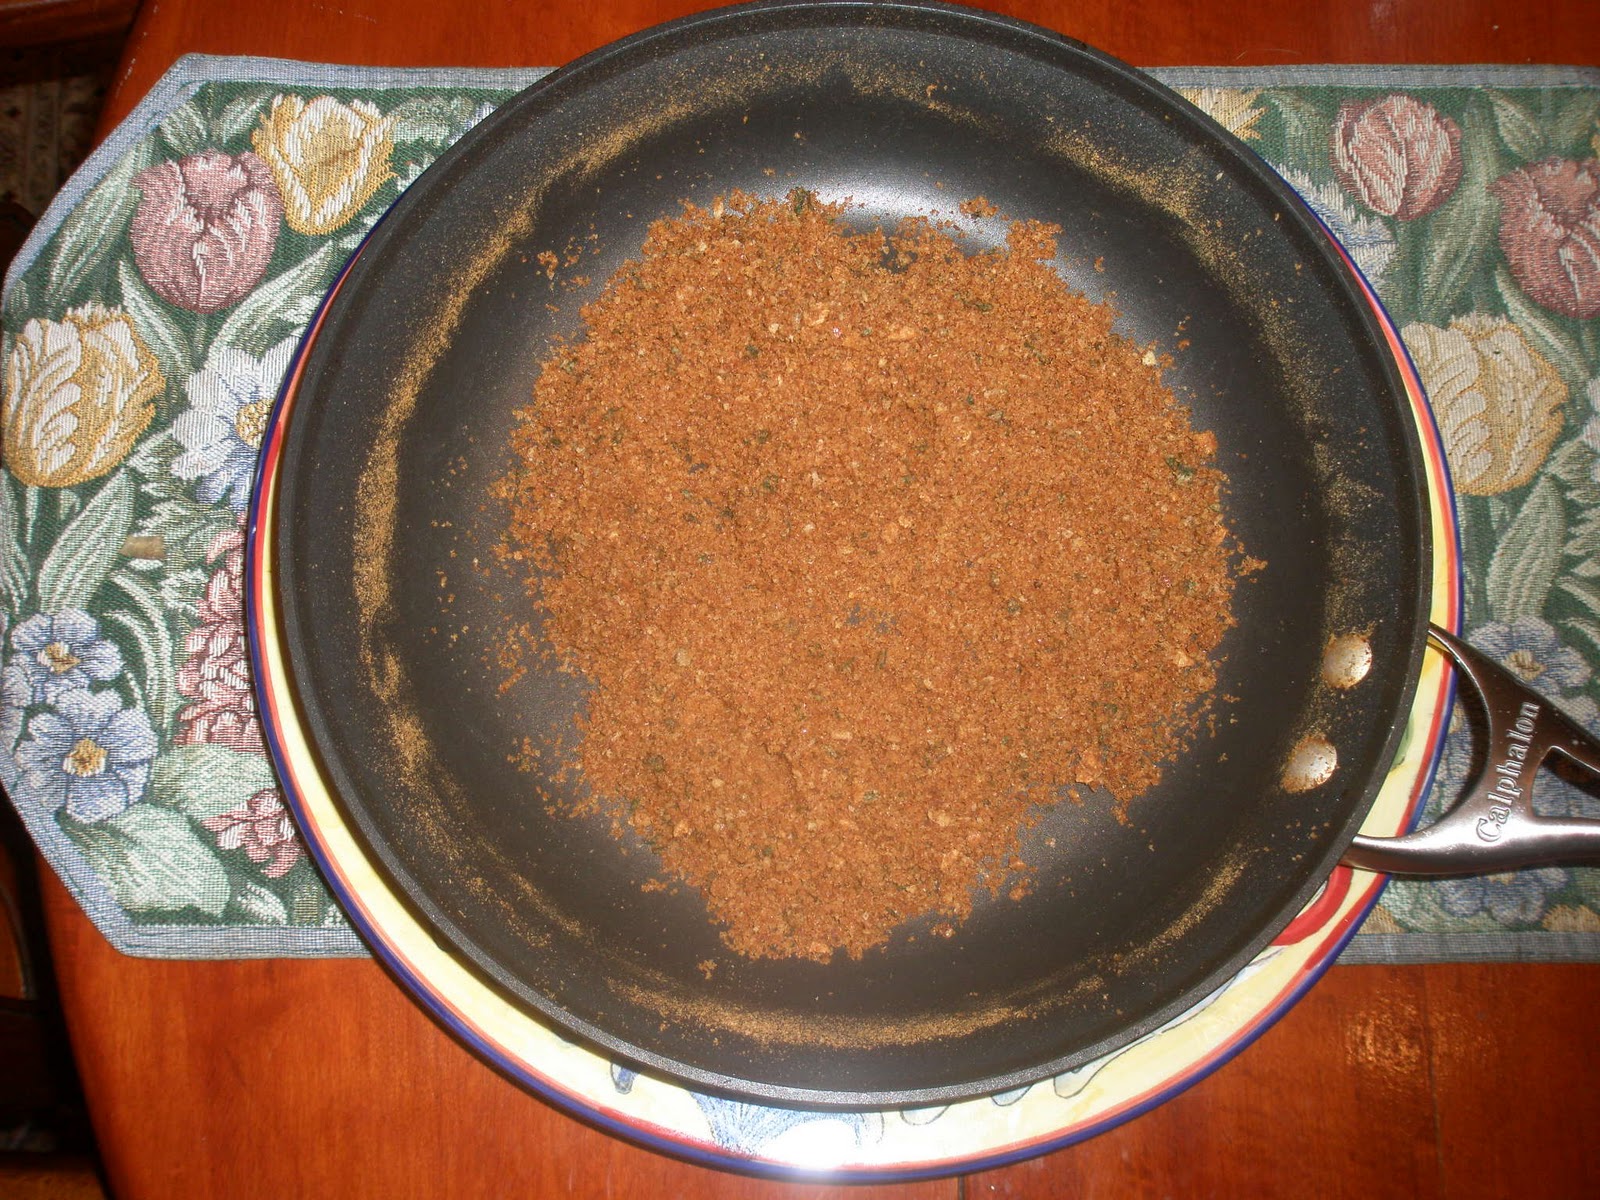
I "dry-fried"  2 cups of the crumbs, which means that no fat was used in a hot pan, until they were golden brown. Dry-frying them maintains crispness.  I also separately  "dry-fried" 2 cloves of garlic, chopped fine, until they were golden and crispy but not burnt. After the crumbs were done, I added seasonings and then added enough olive oil so that the crumbs clumped together. Please season to taste! Taste until the seasonings are to your satisfaction. Try not to over-salt since you will be adding cheese to the final dish This is what the crumbs looked like, nice and brown:
While doing this, I got the water for the pasta to a rolling boil, and added salt, and then the fennel fronds until they gave off a lovely fragance. I let them boil for about 5-10 minutes. I use a drain insert in my pasta pot, so I pulled the fronds out and discarded them. I then added the pasta and cooked them until they were al dente.

I tossed the crumbs together with the pasta in a large bowl.  I sprinkled the cheese over the pasta, and some lovely basil leaves for garnish. At the end, I drizzled olive oil over all.

It was very tasty: a satisfying crunch from the breadcrumbs, savory from the garlic and cayenne pepper and salt, and because of the olive oil, the crumbs adhered well to the pasta. And the fennel: there was a subtle taste, not to mention that my kitchen had a wonderful fragrance!!!


Pictured above is an individual serving...take my word for it, it was delicious and very easy to do!

As I mentioned, we had a great time drying the bread, and grinding it in our hand-grinder. The results were amazing!  However...I visited our new Fairway Market in Pelham NY a few days later and found an interesting product: Artisan crumbs!!! Just like our crumbs, they varied in size, and used in another dish, were virtually the same. So if you do not have time to dry the bread, find an old grinder, and grind the bread, you can just visit the Fairway! Here is the link: www.fairwaymarket.com. Like Stew Leonard's, Fairway is a carnival of food...if you love to shop like I do, and some people do, going through those aisles is both entertaining and enlightening.

Anyway I would like to remind you all that I really appreciate your comments, however I get them. Many people find it confusing as to how to post on this blog, but it is quite simple: just sign in to Google or Yahoo, or if you don't have an account, just sign up which just requires some simple information. You don't have to use their email or any other service. With feedback, I can improve or add to my blog. Any suggestions, recipe requests or criticisms will be most appreciated!!

Happy Fall, everyone!


Thursday, September 30, 2010

Thank you Lidia, and Farmer's Market Recipes

     On September 12,  I was very happy to meet Lidia Bastianich, the Italian-American chef at a book signing event at the Putnam Wine Shop on Broadway in Saratoga Springs.  As I own many of her cookbooks, and am a great admirer, I packed up four of my books to have her sign. She was so nice: I welcomed her to Saratoga, and told her that she was an inspiration to me, and that I have started a cooking blog. She looked up at me and smiled  and said, "Come on, take a picture, and put it in your blog!"  So I did, and here it is!

    Thank you Lidia, you really have been an inspiration to me.  Years ago, when I first saw you on PBS, I felt such an affinity with you and your style of your cooking, so close to my family's.  I continue to watch you and experiment with recipes. Tutti a tavola a mangiare!
     Earlier that same day, our good friends Kathy and Alan gifted us with some wonderful vegetables from their local farmers' market: two pattypan or scallop squash; two perfectly sized and bright green zucchini; a huge heirloom tomato, and two lovely fennel bulbs with their bright green fronds.  That week, I turned each into a meal I could be proud of:

1. PATTYPAN AND ZUCCHINI SQUASH STIR FRY
4 tablespoons olive oil
1  pattypan squash, cubed
1 medium zucchini, cubed to match
1 medium onion, sliced
1 clove garlic, sliced
4 ounce jar roasted red pepper strips, drained
salt and pepper to taste
3 or 4 fresh basil leaves, sliced thin
Grated Romano cheese
Fresh parsley, chopped

Pattypan squash is an unusual looking vegetable, a squat looking thing with a scallop, almost like a fringe, all around. It is a very light green with a pure, tender white flesh.  I heated the olive oil in a very large heated pan to which I added first the onions and then the garlic: this prevents the garlic from burning.  When the onions were slightly caramelized I added the squash and quickly stir fried them until tender. I added the red pepper strips, basil and salt and pepper to taste.  Take care not to overcook as it will become soupy. You might want to stir fry the squash in stages.  I transferred the vegetables to a serving dish and sprinkled them with grated cheese, salt, ground  pepper and fresh parsley. It looked and tasted wonderful.

2. CHICKEN CACCIATORE (Hunter's chicken)
For this dish, I used the very large heirloom tomato to complement the other ingredients of this very versatile dish. It added a sweet freshness to the dish I had never encountered.  In a future blog, I am going to give you this delicious version of chicken cacciatore: it is best in chilly weather, as it is a stew, although it doesn't take forever like most stews.  I must say that it comes out different every time, because I use whatever hearty vegetables I have on hand.

3. BRAISED FENNEL(also called Anise)
2 bulbs fennel, sliced thinly with fronds removed (and reserved for future use.)
2 tablespoons butter
2 tablespoons olive oil
1/2 cup good quality low salt chicken broth water
1/4 cup water
salt and pepper to taste.

This is an unusual dish that I have been making for years. Fennel is a surprising cooked vegetable.  It is much different than when it is raw: it has a crisp, licorice type flavor, and is used as a digestive after meals.  In a large frying pan, on a medium high flame, melt the butter and olive oil until frothy. Add the fennel slices to the butter and oil, add salt and pepper, and cook until caramelized. The sugars in the fennel will allow it to brown nicely.  Do not stir fry: attempt to keep the slices intact, flipping them when done on one side, and then browning them on the other side, about 4 minutes total, taking care not to burn. Add the broth and water, cover and cook until tender. You will not believe the tender sweetness of this dish, and the butter adds a nice touch.

The fronds were so lovely, I packed them away in a ziplock bag because I didn't  have the heart to throw them away. I really did not know what to do with them! Wait until you find out the use I found for them next time, in a very delicious way!


Thursday, September 9, 2010

Sicilian cuisine! Caponata with homemade crostini

For those of you who have never heard of it, caponata is a Sicilian dish, a versatile sweet and sour eggplant appetizer. Just to admit something right off the bat, my family hates the way I pronounce caponata. I am the subject of much hilarity in my attempts to make it sound very Italian, so I tried saying "eggplant appetizer" or pronouncing it with an American accent instead. Nothing seems to work, so I have to ignore the jokes and move on!

As you know from prior blogs, I have been attending some of the cooking demonstrations at the New York Botanical Gardens. I have realized, happily, that if you have cooking skills, a demonstration is all you need! That sure saves money on classes, which I have considered, and may still do to upgrade my baking skills. However, for plain old cooking, there is nothing like a chef going through his favorite recipe for you. In fact, at most of them, I felt like I was reading a great story and couldn't wait to get to the ending.

Caponata I was particularly interested in because in Sicilian restaurants, caponata is as ubiquitous as salsa is in a Mexican restaurant. When I was in Sicily last year, it was served before or during most meals. It is used as appetizer or a topping over fish or chicken or can be used simply as a side dish. It can be served cold, room temperature, or even hot.

Right at the outset I appeal to you not to be intimidated by the seeming complexity of this recipe. It is not really that difficult! Dicing and sauteing the vegetables is the most time consuming part, but after that, it is just a matter of mixing the ingredients in a large bowl and correcting for taste.

This recipe is great for a party appetizer. It is great over crostini, or toasted Italian bread rounds, which can be bought or made fresh. This particular recipe called for making fresh tomato ketchup, intriguing in itself, and is a mix of many sweet and savory ingredients, including raisins, which gives a surprising burst of sweetness. Make sure you do not use store-bought ketchup! I have tweaked the original recipe a bit, as I always do. Here is is:

CAPONATA with HOMEMADE CROSTINI

1 large unpeeled black-skinned eggplant, cut into cubes
6 tablespoons extra virgin olive oil or more (for sauteing)
2 cups diced red and green bell peppers
1 cup celery, sliced thin
2 cups onions, diced (optional)
6 tablespoons (or more) extra virgin olive oil
1/4 cup small capers, rinsed (about 4 tablespoons)
1 cup raisins
1 cup brined black and green olives, chopped
4-5 cloves garlic, chopped
1 cup homemade ketchup, recipe below
1 loaf of long Italian bread or thin baguette
Spray olive oil (I use a Misto, but you can buy it premade)
salt and pepper
Thinly sliced prociutto or basil for garnish if especially ambitious

Saute each vegetable separately in a large frying pan with one or two tablespoonfuls of oil. This is to retain optimum flavor. Do not crowd the pan as the vegetables will steam, not sauté. Make sure you do not overcook the vegetables. As soon as they are cooked through and tender, but not mushy, remove from the pan. They should retain their shape and have an almost "al dente" quality. GREAT TIP: Don't forget to saute the garlic in this manner: start with a cold pan, and cook until tender only. Browning or burning will give it a bitter taste. Also, make sure the celery is tender but do not burn or overcook. Taste as you go!

Place cooked ingredients in a large bowl. Add the capers, raisins and olives. Add just enough homemade ketchup (recipe below) to bind the ingredients. You can serve this right away, but the next day, it is even better!

As an appetizer, serve room temperature or cold, on crostini (recipe below).

Use hot as a side dish or topping for fish or chicken. You can mix it with rice or pasta. A really versatile dish!

HOMEMADE TOMATO KETCHUP (two variations)

1) Cooked version:
1 can 28 ounce can tomato puree
1 cup wine vinegar
1 cup brown sugar
2 teaspoons salt.
Cook down until it is the consistency of ketchup.

2) Uncooked version:
1 cup tomato paste
3/4 cup wine vinegar
1/2 cup brown sugar
2 teaspoons salt

CROSTINI

Slice the long bread or baguette thinly. Place on a lightly greased baking sheet. Spray with olive oil, sprinkle with salt and pepper, place in a 400 degree oven on top rack until lightly brown. In a hot oven this should only take a few minutes, watch carefully! You can store these when cool in a plastic bag.

Next time, a really traditional dish of pasta, bread crumbs, and marinara.

See you then!


Friday, August 27, 2010

Pasta e piselli; upcoming blogs

Pasta e piselli, pasta and peas! It was chilly and rainy for a few days this past week, a welcome change from the unending heat and humidity this summer. I was pining for a warm dish that was quick and easy to prepare. Yours truly had been trying for months to duplicate a childhood dish with little success until last week. I had been asking some Italian neighbors for their family recipes, and of course checking the internet for ideas. Every recipe I tried was blah, off-tasting, pasty, and definitely not what I was aiming for.

So I was delighted when my own family came through! A simple question to cousin Mary and sister-in-law Chris unearthed an old family recipe from Aunt Mary and Aunt Dora that turned out simply delectable. Why did I not think to look in my own backyard?

The result was a fresh, sweet, thick, tomato sauce, with tender spring peas that made tiny little explosions in my mouth. Lightly seasoned, no garlic or herbs, only onion, a truly light touch. That is the key, by the way, to cooking tomato sauce with vegetables. Garlic, basil or oregano or other strong tasting herbs tends to interfere with the sweet, fresh taste of the vegetables.

This is a very easy dish and very child friendly.

PASTA E PISELLI

3 tbs extra virgin olive oil
1 large onion, chopped fine
1 28 ounce can crushed tomato sauce, Tuttorosso is best
1 box of frozen early peas, best quality (I am not up to shelling peas, yet!)
salt and pepper to taste
1 pound pasta of your choice
Grated cheese, pecorino romano works well.

Saute, or "sweat" the onions in the olive oil until translucent. Do not brown. Pour in tomato sauce and peas, salt and pepper to taste. Cook for about 20 minutes or so on a medium low flame until the sauce thickens. Pour it over hot pasta, sprinkle with grated cheese.

UPCOMING BLOGS

I had the pleasure of attending a cooking demonstration at the New York Botanical Gardens on Thursday, August 26. The Executive Chef, Jeremy Bearman, at Rouge Tomate (www.rougetomatenyc.com) on 60th St. in Manhattan, demonstrated a completely authentic version of Sicilian Caponata, which is as ubiquitous in a Sicilian restaurant as salsa is in a Mexican restaurant. It consists of eggplant as well as a variety of sweet and savory ingredients in a kind of homemade catsup, which is really a savory tomato paste. I will attempt this recipe and report on it next week. There is an interesting technique to it, and I learned some tips that I will pass on to you.

In the upcoming weeks, I plan to write about other authentic Italian and Sicilian home recipes. You will not find these in any cookbook! I will also do an update on ice wine, which fascinates me for some reason. I have been sampling other varieties and found out some more interesting information.

A final word: Please don't mourn the end of summer. Let that big harvest moon hanging in the sky remind you that right now, Farmer's Markets are overflowing with fresh seasonal vegetables and fruits at their peak of perfection!

Thursday, August 19, 2010

Italian Fast Food: Pesto!

This week's entry will be about one of my family's favorite meals: Basil pesto with pasta. Pesto sauce originated in Genoa in northern Italy. The word pesto is derived from the Italian word meaning to pound or crush, from the same Latin root as pestle in English. Actually, classic Italian pesto is supposed to be made with a mortar and pestle. Unfortunately I am unwilling to do the hard manual labor required to make the sauce in that way. I understand that the old fashioned way is the preferable way and is supposed to taste much better than the one made with most people's preferred method, which is with the food processor or blender. If I decide to use the mortar and pestle method, I will definitely make a taste comparison and report back to you!

I have been making pesto sauce since we learned we could grow basil in the back yard, and if you didn't do some major harvesting, it would completely take over. The one or two leaves you pluck for flavoring sauces and other dishes simply were not enough, and if you freeze it, it turns into a black tasteless mush once defrosted. Not very appetizing. So pesto is the way to go.

Pesto sauce is so popular with my family, I became emboldened to actually smuggle (customs was interested in hair gel and nailclippers, I was lucky) a giant pillow of basil seeds from a garden store in Venice a few years ago. A garden store in Venice is odd if you think of it, all the streets are water and the backyards are stone. Italians, however, will always find a way. Anyway, the seeds only lasted two years and took a long time to germinate and still weren't altogether right...I guess they needed to be in Venice or at least somewhere in Sunny Italy and not a backyard in the Bronx. I got a few batches of sauce out of them, though.

I never been known to order basil pesto in a restaurant or buy it by the jar in my local Italian market. It never looks right! It always looks oily and loose, and way too finely pureed. I did decide to try it as a research project while dining with a good friend at a fine Italian restaurant on the Upper West Side in Manhattan, Bello Giardino, the other day. I figured that with their spot-on meatballs (they won a 5 Borough Award for Best Meatballs: who knew there was such an award? Which restaurants are runners-up? I need to know this.) and almost perfect meat sauce, it was worth a try. Well, although tasty, their pesto sauce did not pass muster. It was laced with cream, way too bland and buttery tasting. It was a pale green, not a robust dark green like mine, and the cheese was probably parmagiana, which is way to subtle. At least for my taste. And where was the garlic?

My basil pesto is strongly flavored with extra virgin olive oil, basil and garlic and salty, zesty Pecorino Romano cheese. If I have pine nuts in my pantry when the basil is ready to pick, I add that. I add no other condiments. I do love a recipe with only five ingredients, sometimes four!

For the pasta, I usually use linguine, although spaghetti, fusilli, and wider fettucine works well too. In a pinch, I have used ziti or even gemelli. I prefer Barilla pasta, which has a wonderful texture. I don't know how they do it, but for the most part, unless you forget about it and cook it into total mush, it comes out al dente. Any pasta will work, although I think egg noodles are way too delicate.

Here is the recipe:

BASIL PESTO with PASTA

I have varied the amounts in the recipe so you can tailor it to your personal preferences.

1/2 to 3/4 cup of the best extra virgin olive oil you can afford
2-3 cloves garlic, peeled
1 cup to 1 1/2 of grated Pecorino Romano cheese
3-4 cups of basil leaves, rinsed and stems removed
2-3 tablespoons pine nuts (optional)
1 pound linguine or other pasta, preferably Barilla

Boil water for pasta and cook according to package directions.

For this recipe you will need a food processor. If you have a blender, that will work as well but you must stop periodically to push down the leaves with a wooden spoon so they will blend more uniformly.

Some recipes call for placing the basil in the processor bowl or blender first, but I prefer to place the oil with the garlic in first and process for for about 20-30 seconds, and then add the pine nuts, process for 5-10 seconds until they too are fully incorporated. This way the garlic and pine nuts will be broken down and you will not find any errant pieces of garlic or nut in your final product. Then I turn on the food processor once again and add the basil through the feed tube until it is pureed, for another 20-30 seconds or so. With a spatula, scrape the sauce out of the processor or blender container and into a glass or ceramic bowl. Add the 1 to 1 1/2 cup of grated cheese to the mixture. Add more if needed. Some recipes call for salt and pepper, but I find the Pecorino Romano cheese to be salty enough, and the pepper unnecessary. Just make sure you do not use Parmigiana, because it is too subtle! The sauce should be thick, not be runny or oily. Add more grated cheese to make it the right consistency.

Cook the pasta al dente, which means in Italian, "to the tooth". It should be firm at the center, not mushy, and not too hard. When the pasta is done, save some of the pasta water. Rinse the pasta in a colander to prevent sticking, and place in a large ceramic bowl. I use a spaghetti server to make sure the strands are separated. Add the pesto sauce and mix with two wooden spoons, as if you were mixing a salad, using the pasta water by teaspoonfuls if necessary to make it easier to incorporate into the pasta. The sauce should adhere to the pasta completely. Totally green pasta! After the pasta is plated, your guests might want to add more grated cheese, so make sure that is available. Serve immediately, with a green salad with garden tomatoes with vinaigrette, and crusty Italian bread.

Italian fast food, with a minimum of fuss!

Enjoy the rest of the summer, it is going fast!

Friday, August 13, 2010

Just call me Peaches...eh!

This week I would like to talk about some of the surprising experiences I had in Canada...notably sampling the most delicious peaches I have had in the Northeast, as well as the vineyards. Sorry for the week delay but we were unplugged for that long for this delightful trip.

This summer we decided to take a road trip instead of risking a plane trip with crazy passengers and flight attendants, and travel to Ottawa, Toronto and Niagara Falls. While most of the food choices in that part of Canada seem to be hamburgers and anything fried, and very British-influenced (which is to say unconcerned with any kind of interesting cuisine) I was delightfully surprised at the quality of the fruits and vegetables in some of the local markets. We got a hint of this in Ottawa when we visited the fun and always hopping Byward Market, a concentration of fruit and vegetable markets, crafts, and interesting restaurants as well as a great people watching area, right in the middle of this majestic and architecturally interesting city. As it was the beginning of our trip, and with no place to store them, I felt I had to forgo purchasing any of the fragrant and attractively displayed fruit. I was so tempted to buy mounds of local peaches, grapes, blueberries and even fresh, and loose, cranberries. I wish there had been a way!

When we arrived in Niagara Falls for the last leg of our trip, I had no idea what was in store when we took an unexpected trip to Niagara-on-the-lake, a half hour trip northward along the Niagara River. We had arrived from Toronto, filled with bar food for the most part, and had already spent a couple of days ogling the Falls in total awe. Even though Niagara Falls itself is very commercial and busy, and again seems to revel in chain restaurants and bar food, we were lucky to be tucked in a hotel in a quieter section of the Falls area, with a picture window overlooking it all. I had given up, however, on any other than routine food experiences until we took our little trip to that small town up north.

We found out that the Niagara River and the lake it empties into, Lake Ontario, is surrounded by very rich and fertile land. There are numerous fruit farms and orchards in the area, which grow the most delicious fruit. We were told that most of the small farmers could not hire enough workers to maintain their orchards so many of the farmers converted their land to vineyards with much success. That section of Ontario has ideal growing conditions for fruit, especially certain kinds of grapes and happens to be at the same latitude as the Bordeaux region of France, surprisingly.

Niagara-on-the-lake, located on Lake Ontario, is a picturesque town with many cultural amenities. It has a walkable town center and with interesting shops and restaurants, surrounded by lovely homes. It has many bed-and-breakfasts, and numerous opportunities for wine tours, which is a major attraction. After spending a day in the town, we visited a few wineries on the way home and sampled some of their most delicious wines, including ice wines which are very expensive and made by extracting drops of the sweetest juices from grapes that have been frozen on the vines for three days. Ice wine is sweet, but not with the cloying sweetness of some German wines or port. It has the taste of the sweetness of fresh fruit...sweet with a satisfying hint of tartness. Their red table wine and red wine blends are also lovely, as is their un-oaked dry white wine. But their peach wine...Lord was that good. I got away with only buying six bottles, including some second-press ice wine which was yummy but not as expensive as the real stuff, which is upwards of $60 to $90 for a very small bottle.

Anyway, to the peaches: we also visited a couple of fruit markets on the way back and because we were returning home the next day, I bought several pounds of peaches, concord grapes, apricots, pears and the freshest corn you can imagine. The best of the lot were the peaches which tasted as delicious as the Sicilian peaches I sampled last year. They were freestone peaches, with flesh that was fragrant, sweet and tart, perfect for a peach.

HOW TO BUY A PEACH:

I bought my peaches at the side of the road from a Finnish lady who assured me that these were the best peaches ever. Although they were hard, they were deliciously fragrant. Buy them hard but avoid them if they have no smell! They will be tasteless and mealy even when ripe. When ripe a good peach will give a little: eat them immediately or refrigerate them for no more than a couple of days.

What do you do with a peach besides eating it fresh and unadorned?

GRILLED PEACHES with Vanilla ice cream

This is a simple recipe: Just cut along the peach, along the line, and twist to pop it apart. Then pop the pit out. Brush the flesh side with melted butter and dust with cinnamon and sugar if desired. Place on a medium grill which as been oiled and grill for about 5 minutes until the flesh shows grill marks. Take care not to burn! Turn over and grill the skin side for about 2-3 minutes. The peach should be tender but not mushy.

Serve hot with a scoop of vanilla ice cream...Haagen Das or another full fat totally rich brand!


PEACHES WITH WINE: a variation on the Italian version

Cut up a small peach into chunks. You can peel or leave on the skin, whichever you prefer. Place them in a wine glass. Fill the glass with dry white wine or half wine and half sparking water. By the time you finish the drink, the peaches will have soaked in the wine...enjoy the fruit! It is a refreshing treat on a hot summer day...

Enjoy the rest of the summer!